
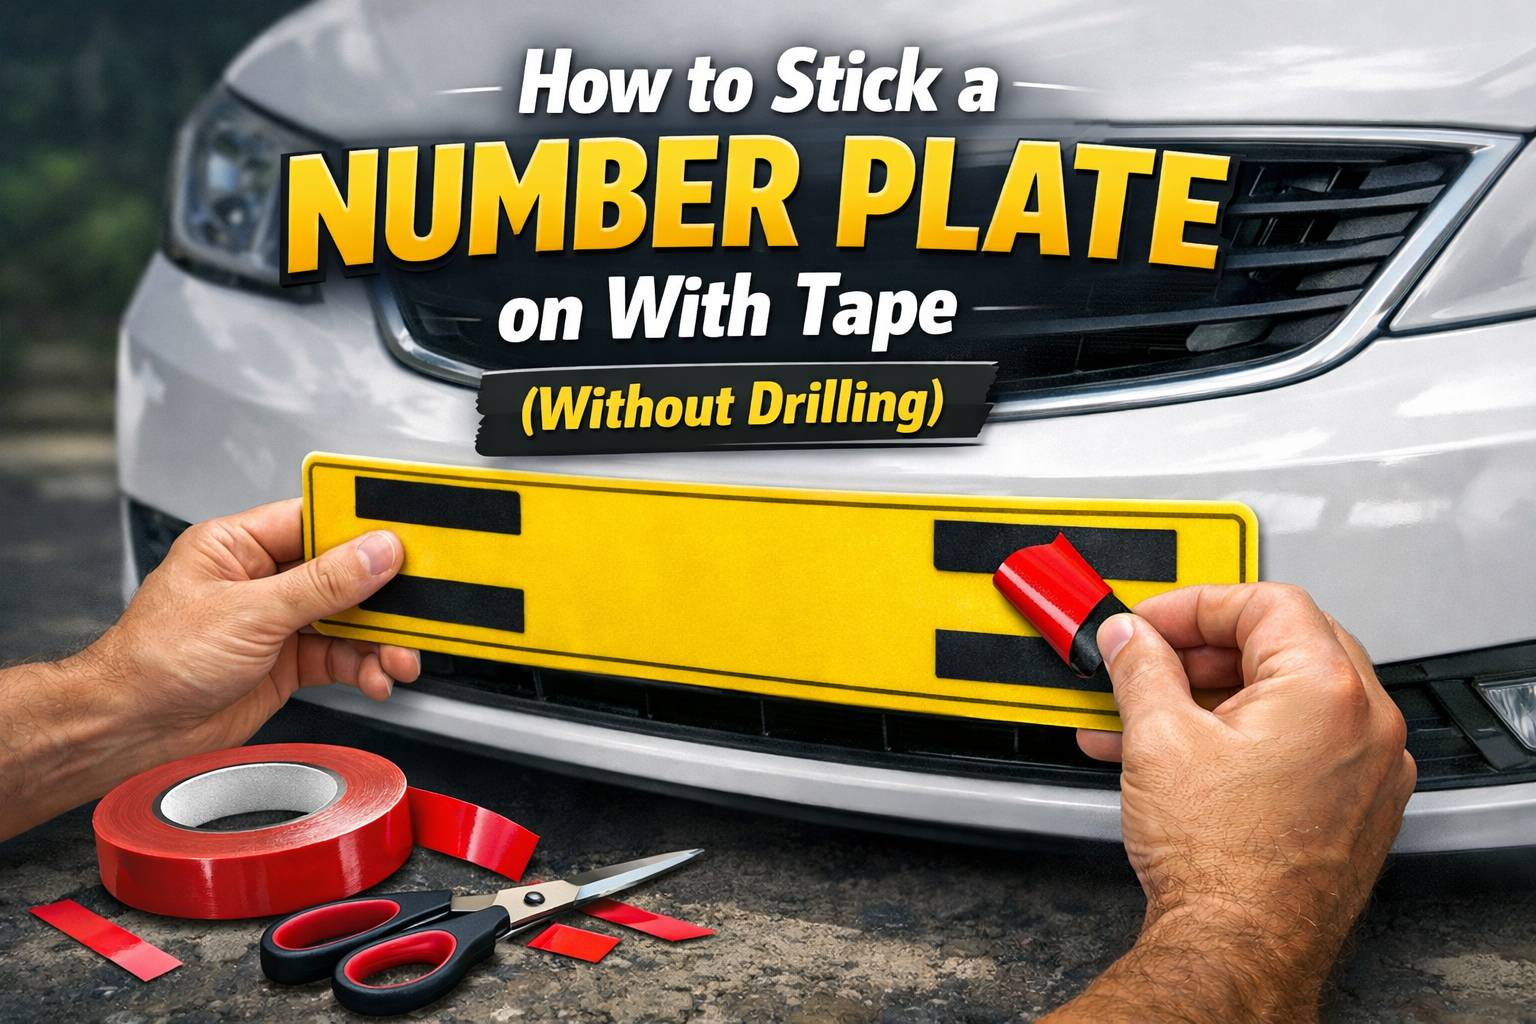
How to Stick a Number Plate on With Tape (Without Drilling)
Mounting a number plate with tape rather than screws gives a cleaner finish, avoids drilling holes through your bodywork, and is actually the method recommended under the current British Standard for number plates. Yet most people still reach for a drill out of habit — or worse, grab a roll of cheap foam tape from a pound shop that fails within a few weeks.
This guide covers everything you need to get it right first time: what tape to use, what width you need, how to prepare the surface, how to apply the plate properly, and how long to wait before driving. We’ll also clear up the legal question — because yes, it’s perfectly legal, and in fact it’s the preferred method.
Why Tape Is Better Than Screws for Number Plates
There are several practical reasons why more drivers — and professional garages — are choosing tape over screws for number plate mounting.
No drill holes in your bodywork. Drilling through a painted bumper or body panel breaks the factory corrosion protection. Over time, those exposed holes become entry points for moisture, leading to rust and paint bubbling around the fixings. On a new car, unnecessary drill holes can also affect resale value.
A cleaner, more modern finish. Tape-mounted plates sit flush against the bumper with no visible fixings. There are no screw heads, no plastic caps, and no holes in the plate itself. It’s a subtle difference, but on a car with a clean front end it looks noticeably better.
No risk of screw damage to the plate. Acrylic number plates can crack around screw holes — especially in cold weather when the material becomes more brittle, or if the screws are overtightened. A tape-mounted plate distributes the load across the full bonding surface rather than concentrating stress at two or four fixed points.
Easier replacement. When you need to change a plate — after a sale, a plate transfer, or if the plate becomes faded — a tape-mounted plate peels off cleanly. There’s no need to unscrew fixings or deal with seized, corroded screws that refuse to come out.
It’s the recommended method. Under the current British Standard BS AU 145e, adhesive pads are the recommended method for fixing number plates to vehicles. The British Number Plate Manufacturers Association (BNMA) confirms this. Screws are permitted, but only on the condition that they don’t obscure or alter the appearance of any characters on the plate.
What Type of Tape Should You Use?
This is where most people go wrong. They pick up a roll of general-purpose double sided foam tape from a DIY store or marketplace site and assume it’ll do the job. It won’t — at least not for long.
General purpose foam tape uses a rubber-based adhesive that degrades in direct sunlight, softens in high temperatures, and loses grip when exposed to rain, road salt, and the plasticisers found in painted bumpers and plastic trims. A plate mounted with cheap foam tape might last a few weeks in summer before the adhesive fails and the plate slides off — usually at the worst possible moment.
What you need is automotive grade double sided foam tape. This is a fundamentally different product. It uses a closed-cell polyethylene foam carrier with a solvent-based acrylic adhesive on both sides — engineered specifically for vehicle exteriors. The key differences that matter for number plate mounting:
UV resistance. The acrylic adhesive doesn’t degrade under prolonged direct sunlight. Your plate will be in full sun for hours every day — standard rubber adhesive simply can’t handle this.
All-weather durability. The tape operates across a temperature range of -40°C to +150°C and is unaffected by rain, frost, road salt, car wash chemicals, and jet wash pressure.
Plasticiser resistance. Modern car bumpers contain plasticisers that migrate to the surface over time. These chemicals actively break down rubber-based adhesives. The acrylic adhesive on automotive grade tape is formulated to resist this.
Permanent bond. The acrylic adhesive builds to full bond strength over 12–24 hours and holds indefinitely under normal conditions. Once cured, it’s not going anywhere.
What Width of Tape Do You Need?
The width of tape you choose depends on the type of number plate you’re mounting.
For standard acrylic plates: Use 19mm automotive foam tape. This is the standard width for number plate mounting. Apply two horizontal strips — one along the top edge and one along the bottom edge of the plate. The 19mm width sits neatly behind the plate frame without being visible, while providing enough adhesive contact area to hold a standard-weight acrylic plate securely.
For heavy pressed-metal or 4D plates: Use 25mm automotive foam tape. Pressed aluminium plates and thick 4D gel plates are heavier than standard acrylic, so they need a wider tape for additional bonding surface. The 25mm width provides roughly 30% more adhesive contact area per strip, which makes a meaningful difference when supporting a heavier plate — especially on a vertical rear panel where gravity is working against the bond.
For smaller plates (motorbike, square rear): Use 12mm automotive foam tape. The narrower width is easier to work with on compact plates and provides a proportionate bond for lightweight, smaller-format plates.
All three widths are available on 50-metre rolls, so a single roll will mount dozens of plates — making them cost-effective for garages and body shops as well as individual drivers.
Step-by-Step: How to Stick a Number Plate on With Tape
Follow these steps for a clean, permanent bond that will last the life of the plate.
What You’ll Need
- Automotive double sided foam tape (19mm or 25mm depending on plate type)
- Isopropyl alcohol (IPA) — available from most motor factors and online
- Clean lint-free cloth or microfibre towel
- Scissors or a sharp craft knife
- Masking tape (optional, for positioning)
Step 1: Remove the Old Plate
If there’s an existing plate, remove it. For screw-mounted plates, unscrew the fixings. For tape-mounted plates, gently pry one corner and peel slowly — the foam may tear rather than release cleanly, so work patiently rather than pulling hard.
If there’s old adhesive residue left on the bumper, remove it with an adhesive remover or IPA and a plastic scraper. Don’t use metal scrapers on painted surfaces — they’ll scratch the paint.
Step 2: Clean the Bumper Surface
This is the most important step. More tape-mounted plates fail because of poor surface preparation than for any other reason.
Wash the area with soapy water to remove dirt, road grime, and loose debris. Then wipe thoroughly with isopropyl alcohol on a clean lint-free cloth. The IPA removes wax, polish, silicone dressings, and the invisible film of road contaminants that prevent adhesive from gripping properly.
Allow the surface to dry completely. If you’re working outdoors in cold or damp conditions, dry the area with a clean cloth — even a thin film of condensation will weaken the bond.
For detailed guidance on surface preparation for different substrates, see our Surface Preparation and Application Guide.
Step 3: Clean the Back of the Plate
The back of the number plate needs the same treatment. New plates often arrive with a fine dust or residue from manufacturing. Wipe the back with IPA on a clean cloth and allow to dry. If you’re reusing a plate, remove any old adhesive residue first.
Step 4: Cut and Apply the Tape to the Plate
Cut two strips of tape to the width of the plate, minus about 10mm from each end. You want the tape to run along the full width but stop just short of the edges — this prevents the tape being visible from the front.
Peel the release paper from one side of each strip and press firmly onto the back of the plate — one strip along the top edge, one along the bottom. Run your thumb or a roller along the full length to ensure consistent contact with no air pockets.
Why apply the tape to the plate, not the car? It’s easier to position and align the strips accurately on a flat plate sitting on a workbench than on a curved bumper. It also gives you the chance to check alignment before committing to the final bond.
For heavy plates, add a third strip of tape across the middle for extra security. This is particularly worthwhile on tall rear plates and any plate mounted on a vertical surface.
Step 5: Position and Attach the Plate
Peel the remaining release paper from the exposed tape strips. Before pressing the plate onto the car, take a moment to position it accurately. Once the adhesive makes contact with the bumper, it grips immediately and repositioning is very difficult.
Tip: If you’re nervous about getting the position right first time, use small pieces of masking tape to mark the intended corners on the bumper as a guide. Some people also find it helpful to hold the plate in position (without pressing) and step back to check it’s centred and level before committing.
When you’re happy with the position, press the plate firmly onto the bumper. Apply strong, even pressure across the entire plate for 30 seconds — press from the centre outwards to push any trapped air to the edges.
Step 6: Wait Before Driving
This is where patience pays off. The acrylic adhesive grips on contact, which makes the plate feel secure immediately — but the bond hasn’t reached full strength yet.
Allow a minimum of 12 hours before driving. Ideally, leave the car overnight. The adhesive needs time to cure and build its permanent chemical bond with both the plate and the bumper surface.
In cold weather (below 10°C), allow 24–48 hours. Low temperatures slow the curing process significantly. If possible, park the car in a garage or covered area during the curing period.
Do not wash the car for at least 24 hours after application. Water — especially high-pressure jet washing — can work its way under the edges of a newly applied tape before the adhesive has fully cured.
Common Mistakes to Avoid
Using cheap, non-automotive foam tape. This is the number one cause of number plate tape failure. General purpose foam tape from DIY stores and online marketplaces uses a rubber adhesive that will degrade within weeks of outdoor exposure. Always use automotive grade tape with acrylic adhesive.
Skipping the IPA wipe. A bumper that looks clean to the eye is almost never clean enough for tape adhesion. Wax, polish, silicone dressings, and invisible road film all prevent the adhesive from gripping. The IPA wipe takes 30 seconds and is the difference between a plate that holds for years and one that falls off in a car wash.
Applying in cold or wet conditions. Below 10°C, the adhesive’s initial tack is significantly weaker and the curing time increases dramatically. If you must apply in cold weather, bring the tape and the plate indoors for at least an hour beforehand so they’re at room temperature, and extend the curing time to 48 hours.
Driving straight after application. The tape feels firm as soon as the plate is pressed on, which makes people assume it’s ready. It isn’t. The vibration and wind pressure of driving before the adhesive has cured can cause the plate to shift or detach. Give it at least 12 hours — overnight is safest.
Using tape that’s too narrow. A thin strip of 6mm tape might seem like enough for a flat plate, but it provides very little adhesive contact area. For a standard number plate, 19mm is the minimum recommended width. For heavy plates, step up to 25mm. The additional material cost is negligible — a 50-metre roll will mount dozens of plates.
Not cleaning old adhesive residue. If you’re replacing a plate that was previously tape-mounted, any old adhesive left on the bumper creates a poor bonding surface. The new tape bonds to the old residue rather than to the bumper itself, and the residue eventually fails. Always clean back to bare paint or bare plastic before reapplying.
Is It Legal to Mount a Number Plate With Tape in the UK?
Yes — and in fact, adhesive mounting is officially the preferred method.
The current British Standard for number plates, BS AU 145e, covers the requirements for plate materials, characters, and fixings. Under this standard, adhesive pads are the recommended method of fixing plates to vehicles. The British Number Plate Manufacturers Association (BNMA) confirms this on their website, noting that adhesive mounting ensures plates remain easy to read by both people and automatic number plate recognition (ANPR) cameras.
Screws and bolts are also permitted as a fixing method, but they carry a specific legal restriction: they must not obscure, alter, or change the appearance of any characters on the plate. A screw placed in the wrong position — for instance, making a “3” look like an “8” or an “F” look like an “E” — is a legal offence that can result in a fine of up to £1,000.
So tape mounting isn’t just legal — it actually avoids the risk of screw-related display offences entirely, because there are no fixings near the characters at all.
The key legal requirements for any number plate, regardless of fixing method, are:
- The plate must be securely attached and not liable to detachment while driving
- The plate must be displayed vertically (or as close to vertical as practical)
- All characters must be clearly legible in normal daylight
- The plate must meet BS AU 145e standards for materials, reflectivity, font, and character sizing
- The plate must display the supplier’s name and postcode, plus the manufacturer’s mark
As long as your plate meets these standards and is securely bonded with a suitable automotive adhesive, tape mounting is fully compliant with UK road vehicle regulations.
A note on “stick-on plates”: You may see references to stick-on number plates being illegal. This refers to vinyl or sticker-style plates — where the characters themselves are printed or stuck onto a surface — not to the method of fixing a proper BS AU 145e acrylic plate with adhesive tape. A regulation acrylic plate mounted with automotive foam tape is completely legal.
What If the Plate Needs to Come Off Later?
Automotive foam tape is designed for permanent bonding, so removal requires a bit of effort — but it’s straightforward.
Start by gently prying one corner of the plate with a plastic trim tool or a credit card. Once you’ve lifted an edge, peel the plate away slowly and steadily. The foam may tear during removal rather than releasing in one piece — this is normal. Don’t pull hard or use a metal tool, as you risk scratching the bumper.
Once the plate is off, any remaining adhesive residue can be removed with a dedicated adhesive remover, WD-40, or isopropyl alcohol. Apply the remover, let it soak for a minute, then rub away with a microfibre cloth. For stubborn residue on painted surfaces, a clay bar works well without risking paint damage.
Quick Checklist
Before you start, run through this checklist to make sure you have everything you need and haven’t missed a step:
- Automotive grade double sided foam tape — 19mm for standard plates, 25mm for heavy plates
- Isopropyl alcohol and clean lint-free cloths
- Scissors or craft knife
- Bumper surface cleaned with IPA and fully dry
- Back of plate cleaned with IPA and fully dry
- Old adhesive residue removed if replacing a previous plate
- Tape cut to width and applied to back of plate
- Plate positioned, checked for alignment, and pressed firmly for 30 seconds
- Car left stationary for minimum 12 hours (24–48 hours in cold weather)
- No car washing for at least 24 hours after application
Need the Right Tape?
We stock automotive grade double sided foam tape in five widths from 6mm to 50mm, all on 50-metre rolls with bulk discounts. For number plate mounting, the 19mm and 25mm rolls are the ones you need.
Every roll is dispatched from our Leicester warehouse within 2–3 working days, with free mainland UK shipping on orders over £30 and next day delivery available on orders placed before 12pm.
If you’re not sure which tape is right for your application, contact our product support team — we’re always happy to help.

Add comment